06. UI Kit Interface Management & Rapid Development Solution
Introduction to UI Kit
UI Kit is a set of interface management and rapid development solutions.
The features of UI Kit are as follows:
Interface management
Hierarchy management
Code generation and component automatic binding (using ViewController at the bottom)
Basic Usage of UI Kit
UI Kit itself has a recommended workflow, and the design of this workflow is to make each interface only responsible for displaying data and listening to user input. The interfaces are independent of each other and can be independently tested.
Next, we will introduce how to create a game homepage (UIBasicPanel).
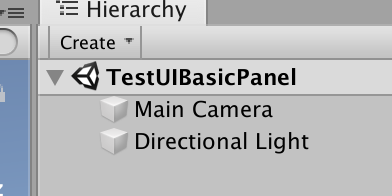
First, we create a scene: TestUIBasicPanel, as shown in the figure below:

Here, everyone should pay attention to it. UI Kit recommends creating a corresponding test scene for each interface to ensure that each interface can be independently tested.
Then open TestUIBasicPanel as shown below:
We drag out a UIRoot prefab, as shown below:

Here, all the levels supported by UI Kit can be seen very clearly.
Then we create a Panel (right-click Design->UI->Panel) under the Design level and name it UIBasicPanel, as shown below:

Here, I want to say that the Design level, as the name suggests, is the level used for design. What is design? It is to assemble the interface. This level is specifically used to assemble the interface. The Design level will automatically hide itself and all child nodes during operation.
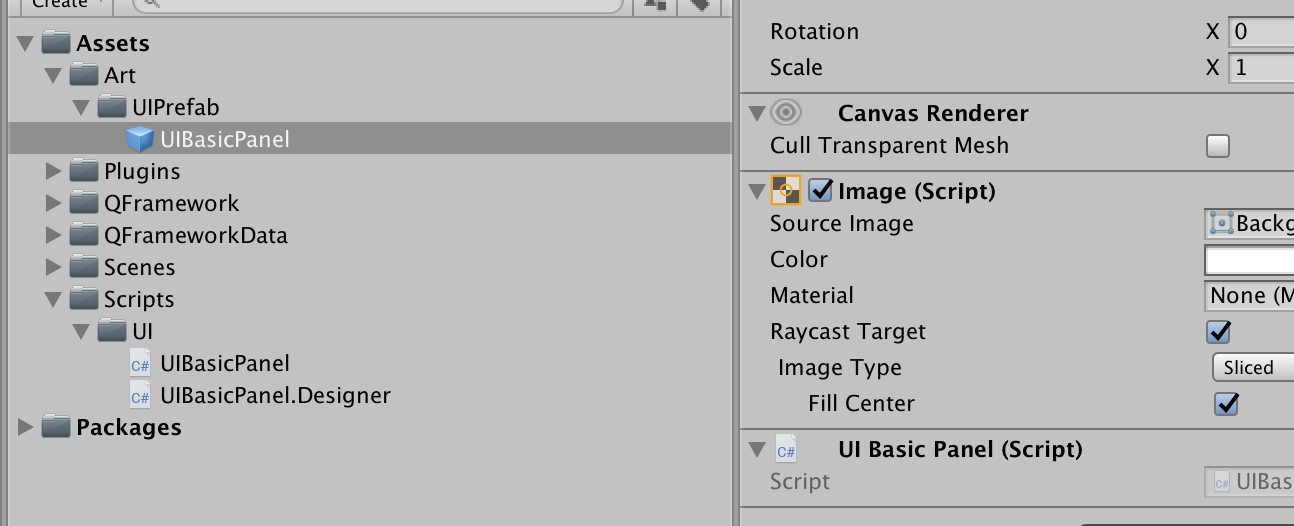
OK, next, we will make UIBasic into a prefab and put it in the Assets/Art/UIPrefabs directory. If there is no such directory, create it manually.
After putting it in, it looks like the following figure:
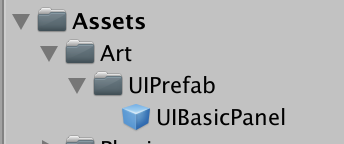
How did the Assets/Art/UIPrefab directory come about? It is a location designated by QFramework for placing UI interface prefabs. And Assets/Art is the recommended location for the framework to store resources. Of course, the storage location of resources is only recommended, not mandatory.
However, the prefab of the UI interface must be placed in the Assets/Art/UIPrefab directory because this part is required during code generation.
So some players may ask, can the Assets/Art/UIPrefab path be changed?
Of course, the way to change it is also very simple. Open the package management panel (QFramework/Preference ctrl + e), and you can see the following panel after opening it:

The detailed setting method is introduced above, and I will not introduce it here.
Next, you need to mark the UIHomePanel prefab as AssetBundle, as shown in the figure below:

After successful tagging, you will see the following result:

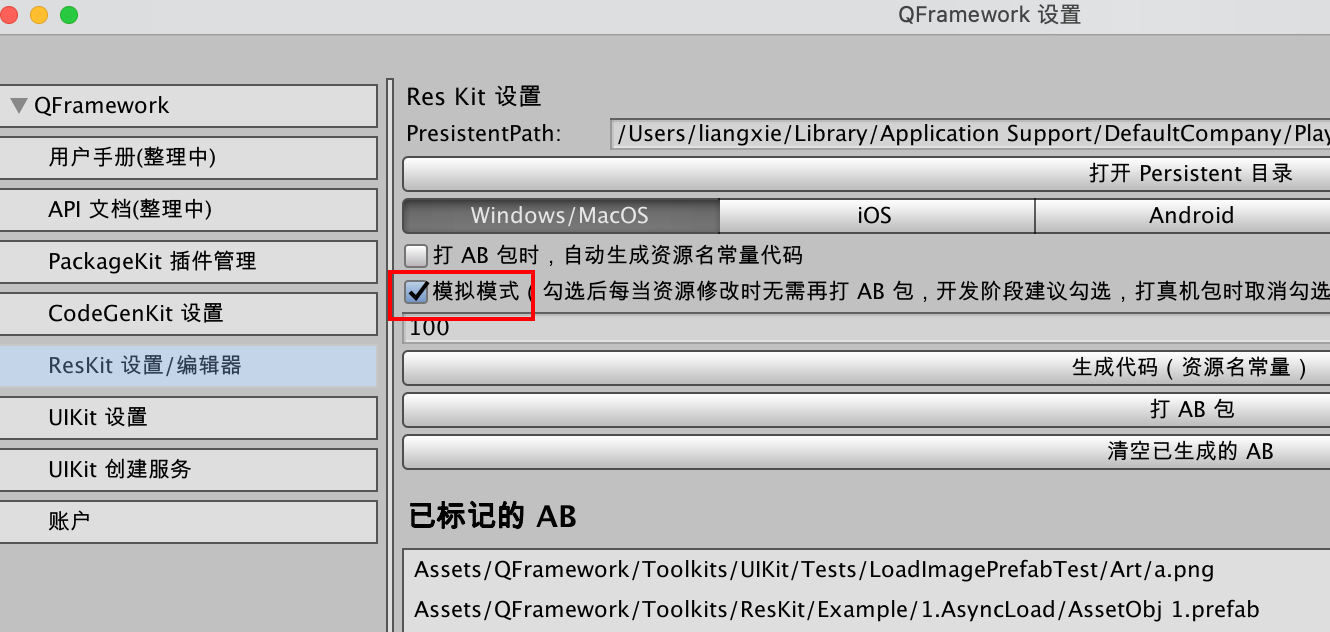
Next, we need to ensure that Res Kit is in simulation mode. Check if the following option is checked in the panel.
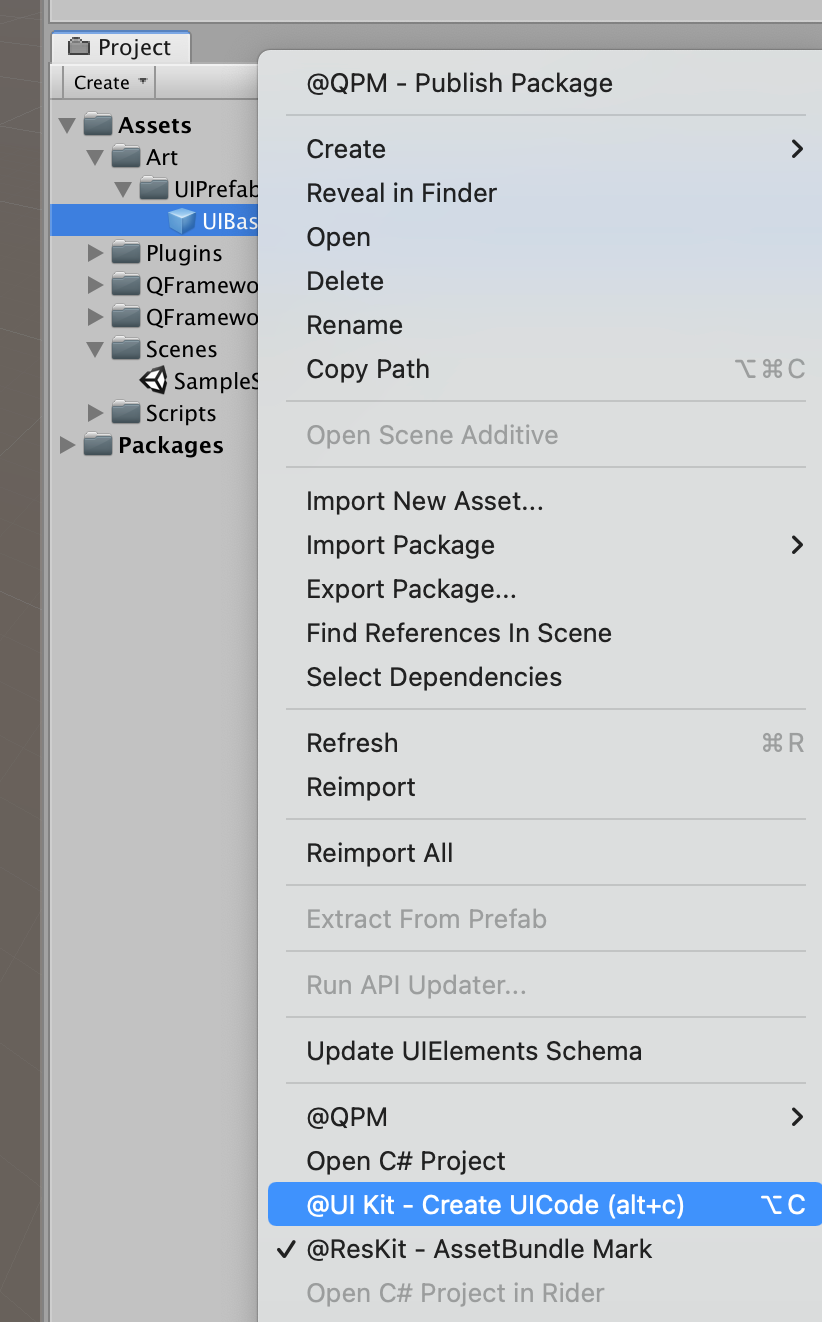
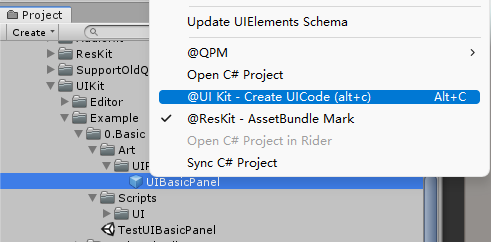
After ensuring that it is checked, we can start generating code. The specific operation is shown below (right-click -> @UI-Kit Create UI Code):
After clicking, wait for the compilation to finish. After the compilation is completed, we see the following result:
Script generated successfully
The script is automatically mounted on the UIBasicPanel Prefab
At this point, the code generation part is introduced.
Next, we find a way to make this scene run independently.
Now, if we run the scene directly, no interface will be loaded, as shown below:

How to load UIBasicPanel in this scene?
It’s very simple, use UIPanelTester as shown below:
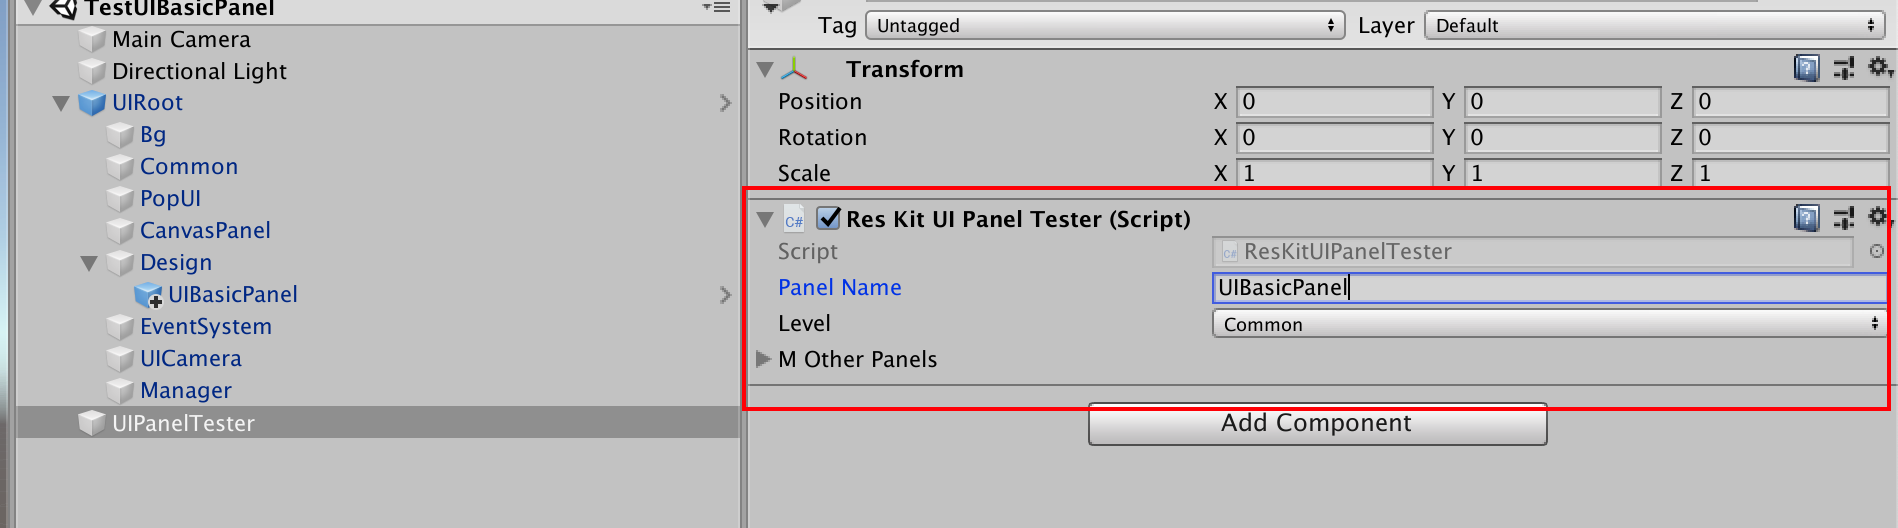
Set it up as shown in the figure, and then run the scene. The result is as follows:

The interface is successfully loaded in the figure.
In this way, the most basic UIBasicPanel test scene is set up, and we have completed it completely according to the recommended workflow of QFramework.
Although the steps may be a bit cumbersome, everyone will find it worthwhile after using it for a while.
OK, next we will introduce the automatic binding function of controls.
Automatic binding function of controls
We add some buttons to UIBasicPanel and attach the Bind script to each button, as shown below:
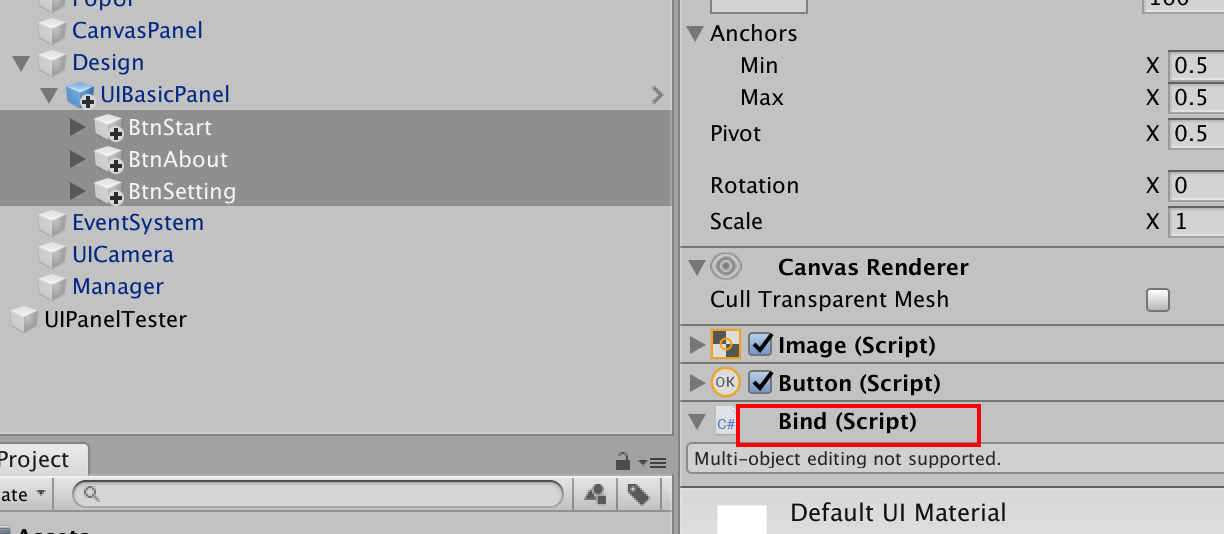
Then Apply UIBasicPanel, as shown below:
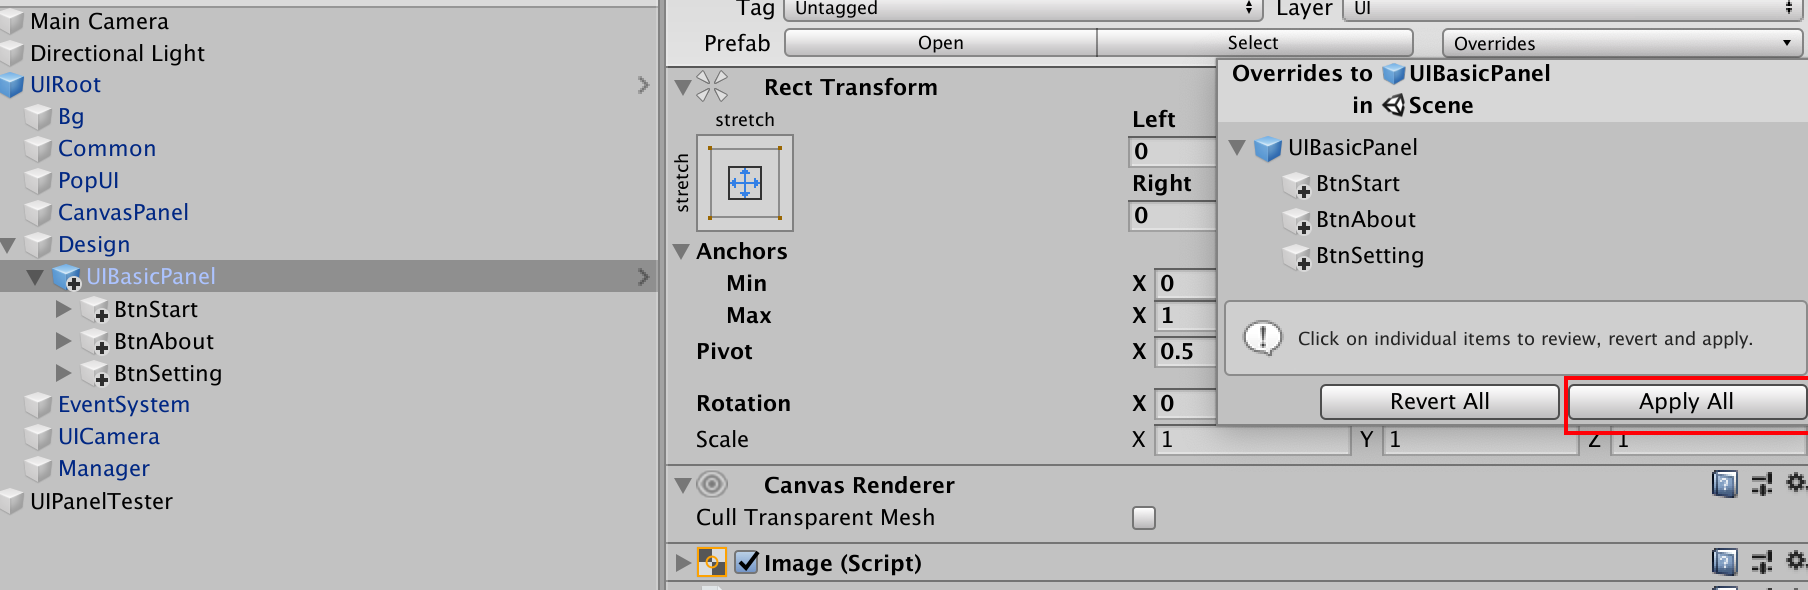
Here are the translations:
Please note that you must select UIBasicPanel before applying, and do not select UIRoot by mistake.
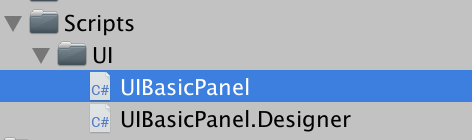
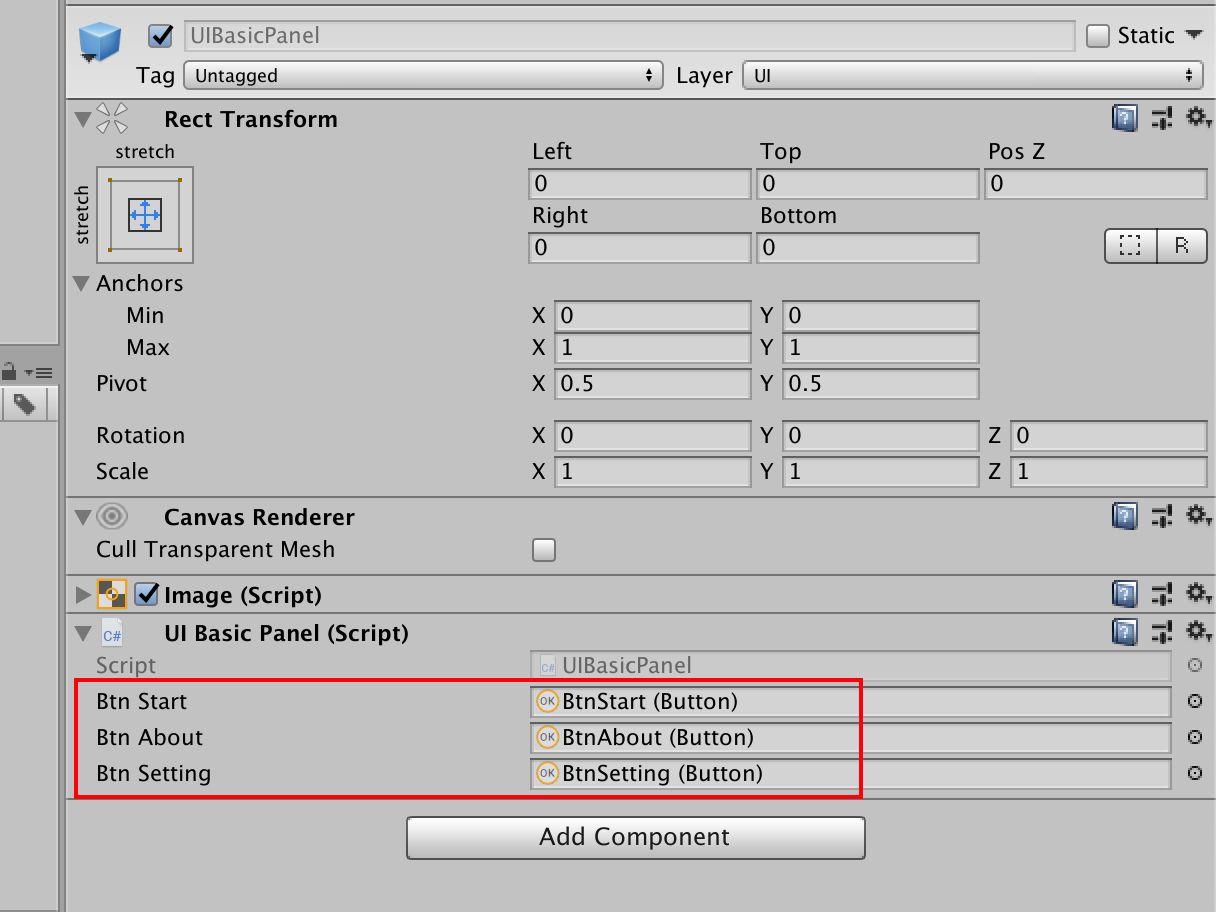
After applying, generate the code again as shown below:
After generating, the result is as follows:
Then, we open the UIHomePanel.cs script and try to write some code:
using UnityEngine;
using UnityEngine.UI;
using QFramework;

namespace QFramework.Example
{
    public class UIBasicPanelData : UIPanelData
    {
    }
    public partial class UIBasicPanel : UIPanel
    {
        protected override void OnInit(IUIData uiData = null)
        {
            mData = uiData as UIBasicPanelData ?? new UIBasicPanelData();

            BtnStart.onClick.AddListener(() =>
            {
                Debug.Log("开始游戏");
            });
        }

        protected override void OnOpen(IUIData uiData = null)
        {
        }

        protected override void OnShow()
        {
        }

        protected override void OnHide()
        {
        }

        protected override void OnClose()
        {
        }
    }
}
The code is very simple, mainly registering the BtnStart button during OnInit.
Then we run the scene, click the BtnStart button, and get the following result:

This is the end of the introduction to the automatic binding function of controls.
The automatic binding function and the View Controller + Bind use the same mechanism.
Opening and Closing Panels
We run UIBasicPanel through UIPanelTester.
UIPanelTester is a UI interface tester that can only run in the editor environment.
To truly open a UI interface, it is done through the API UIKit.OpenPanel.
Just write the following code:
UIKit.OpenPanel<UIBasicPanel>();
The code is very simple.
It is also relatively easy to close a UI interface, with the following code:
UIKit.ClosePanel<UIBasicPanel>();
If you want to close yourself within a panel, the code is as follows:
this.CloseSelf(); // this inherits from UIPanel
OK, we have encountered 3 APIs:
UIKit.OpenPanel
(); UIKit.ClosePanel
(); UIPanel.CloseSelf();
The last two are simple, but the first one is important because it has some parameters that we can fill in.
UIKit.OpenPanel
The parameter definition and overload of UIKit.OpenPanel are as follows:
public static T OpenPanel<T>(UILevel canvasLevel = UILevel.Common, IUIData uiData = null,
            string assetBundleName = null,
            string prefabName = null) where T : UIPanel
{
    ...
}

public static T OpenPanel<T>(IUIData uiData, PanelOpenType panelOpenType = PanelOpenType.Single,
            string assetBundleName = null,
            string prefabName = null) where T : UIPanel
{
    ...
}

public static UIPanel OpenPanel(string panelName, UILevel level = UILevel.Common, string assetBundleName = null)
{
    ...
}
All parameters are as follows:
canvasLevel: Where the interface is opened
Default value: Common
uiData: Initial data passed to the interface when opened
Default value: null
assetBundleName: The name of the assetBundle where the interface resources are located
Default value: null
prefabName: If the interface name is different from the prefab name, use this parameter to load the interface resources
Default value: null
All have default values, so these four parameters can be omitted.
However, these four APIs are very useful in certain situations.
Here are some examples.
// 在 Forward 层级打开
UIKit.OpenPanel<UIBasicPanel>(UILevel.Forward);

// 传递初始数据给 UIHomePanel
UIKit.OpenPanel<UIBasicPanel>(new UIHomePanelData()
{
    Coin = 10
});

// 从 UIHomePanelTest.prefab 加载界面
UIKit.OpenPanel<UIBasicPanel>(prefabName: "UIBasicPanel");
They are all easy to understand.
Some may ask, where do we use the UIHomePanelData passed to UIHomePanel?
It is used in OnInit and OnOpen, as shown below:
namespace QFramework.Example
{
    using System;
    using System.Collections;
    using System.Collections.Generic;
    using System.Linq;
    using UnityEngine;
    using UnityEngine.UI;


    public class UIBasicPanelData : QFramework.UIPanelData
    {
        public int Coin;
    }

    public partial class UIBasicPanel : QFramework.UIPanel
    {
        protected override void OnInit(QFramework.IUIData uiData)
        {
            mData = uiData as UIBasicPanelData ?? new UIBasicPanelData();
            // please add init code here
            // 外边传进来的,第一次初始化的时候使用
            Debug.Log(mData.Coin);
        }

        protected override void OnOpen(QFramework.IUIData uiData)
        {
            // 每次 OpenPanel 的时候使用
            Debug.Log((uiData as UIBasicPanelData).Coin);
        }

        protected override void OnShow()
        {

        }

        protected override void OnHide()
        {
        }

        protected override void OnClose()
        {
        }
    }
}
Why do we do this?
I think there are two ways to display data in an interface. One is to fill in data from the outside, such as warnings, pop-ups, or item information pages. The other type of interface is to obtain and display data on its own, such as the main character’s gold coins, level, experience, etc.
If the data of the interface is filled from the outside, the interface will have better reusability.
Of course, whether a reusable interface is needed or not depends on everyone’s needs, and having a reusable interface does not necessarily mean that it is good.
Asynchronous Loading of Interfaces
StartCoroutine(UIKit.OpenPanelAsync<UIHomePanel>());
// 或者
UIKit.OpenPanelAsync<UIHomePanel>().ToAction().Start(this);
On the WebGL platform, AssetBundle loading resources only supports asynchronous loading, so UIKit provides asynchronous loading support.
UIPanel Lifecycle
Let’s first take a look at the code of UIBasicPanel as follows:
namespace QFramework.Example
{
    using System;
    using System.Collections;
    using System.Collections.Generic;
    using System.Linq;
    using UnityEngine;
    using UnityEngine.UI;


    public class UIBasicPanelData : QFramework.UIPanelData
    {
    }

    public partial class UIBasicPanel : QFramework.UIPanel
    {
        protected override void OnInit(QFramework.IUIData uiData)
        {
            mData = uiData as UIHomePanelData ?? new UIHomePanelData();
            // please add init code here


        }

        protected override void OnOpen(QFramework.IUIData uiData)
        {
        }

        protected override void OnShow()
        {

        }

        protected override void OnHide()
        {
        }

        protected override void OnClose()
        {
        }
    }
}
The default lifecycle functions are as follows:
OnInit
OnOpen
OnShow
OnHide
OnClose
OnInit is called when the prefab containing the UIPanel is initialized. When calling UIKit.OpenPanel, if there is no corresponding cached interface in UIKit, OnInit will be called once in this cycle.
OnOpen is called every time UIKit.OpenPanel is called.
OnShow is actually called at the same time as UIKit.OpenPanel, but OnShow is an API left over from the initial version, so it is retained. Of course, when UIMgr.ShowPanel is called, OnShow will be called.
OnHide is called when UIKit.HidePanel is called.
Finally, OnClose is triggered when UIKit.ClosePanel is called, and in fact, OnClose is equivalent to the OnDestory cycle.
That’s about it. UIKit.OpenPanel triggers resource loading and initialization operations, while UIKit.ClosePanel triggers unloading and destruction operations. Just remember these two points.
I basically only use the OnInit and OnClose cycles, and occasionally use OnOpen.
OK, that’s all for this article.
Other Commonly Used APIs in UIKit
UIKit.Root.SetResolution
Parameter definition is as follows:

Corresponding to the Canvas Scaler on UIRoot as follows:
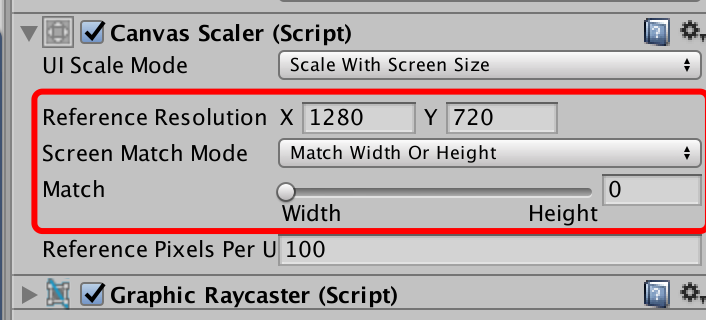
For most projects, using this API for screen adaptation is sufficient.
UIKit.Root.Camera
Get the camera of UIRoot.
var uiCamera = UIKit.Root.Camera;
UIKit.Stack.Push, UIPanel.Back (Pop)
Sometimes, UI needs to implement a stack of UI interfaces to support operations such as returning to the previous page.
At this time, Push and UIPanel.Back can be used to achieve this.
Sample code:
UIKit.Stack.Push(this); // this 是 Panel// UIHomePanel 需要确保是打开的状态,如果不打开会报错。
UIKit.Stack.Push<UIHomePanel>();

this.Back(); // 弹出 UIHomePanelthis.Back(); // 弹出 this
Very simple.
UIPanel Automatic Generation Tool
At the beginning of this article, the author manually created a set of test and development scenarios around UIBasicPanel, which was quite cumbersome.
To solve this problem, the author wrote a simple UIPanel automatic generation tool.
Next, let’s take a look at its basic usage process.
Basic Usage
First, press the shortcut key ctrl + e to open the PackageKit panel, as follows:
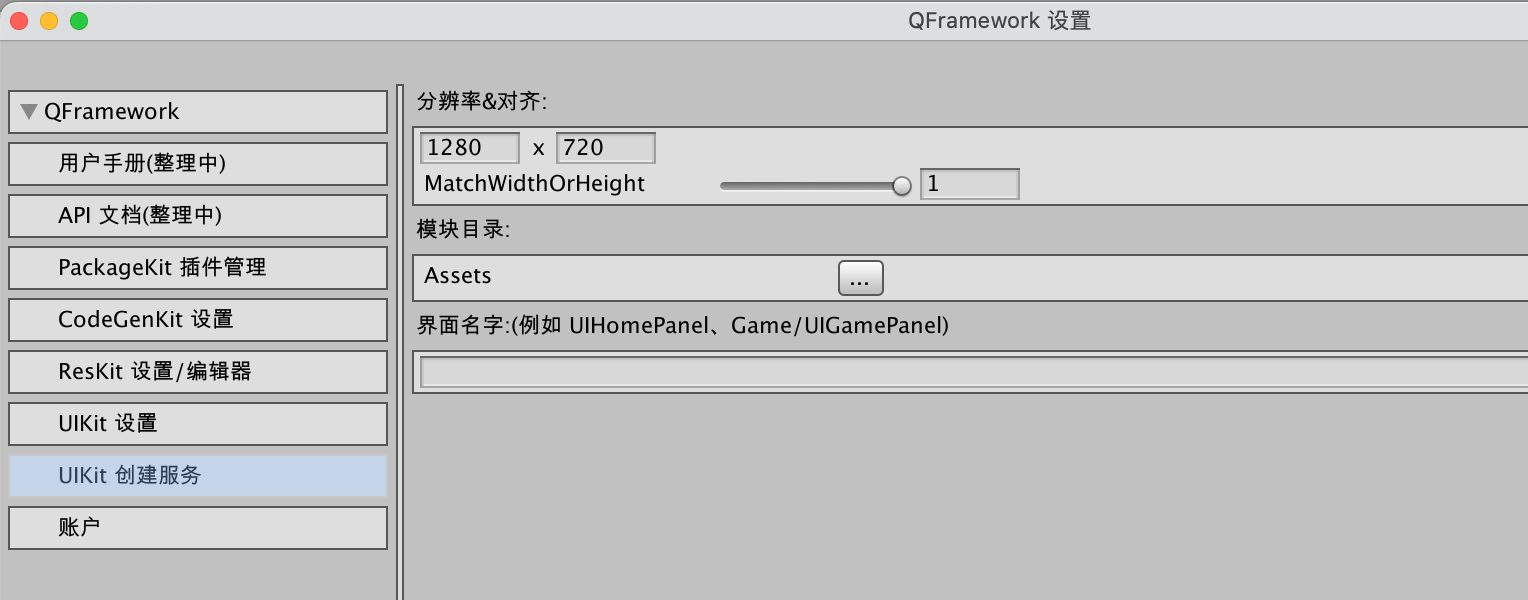
In the input box of the interface name in the above figure, enter Game/UIGamePanel, and then click Create UI Panel, as shown below:
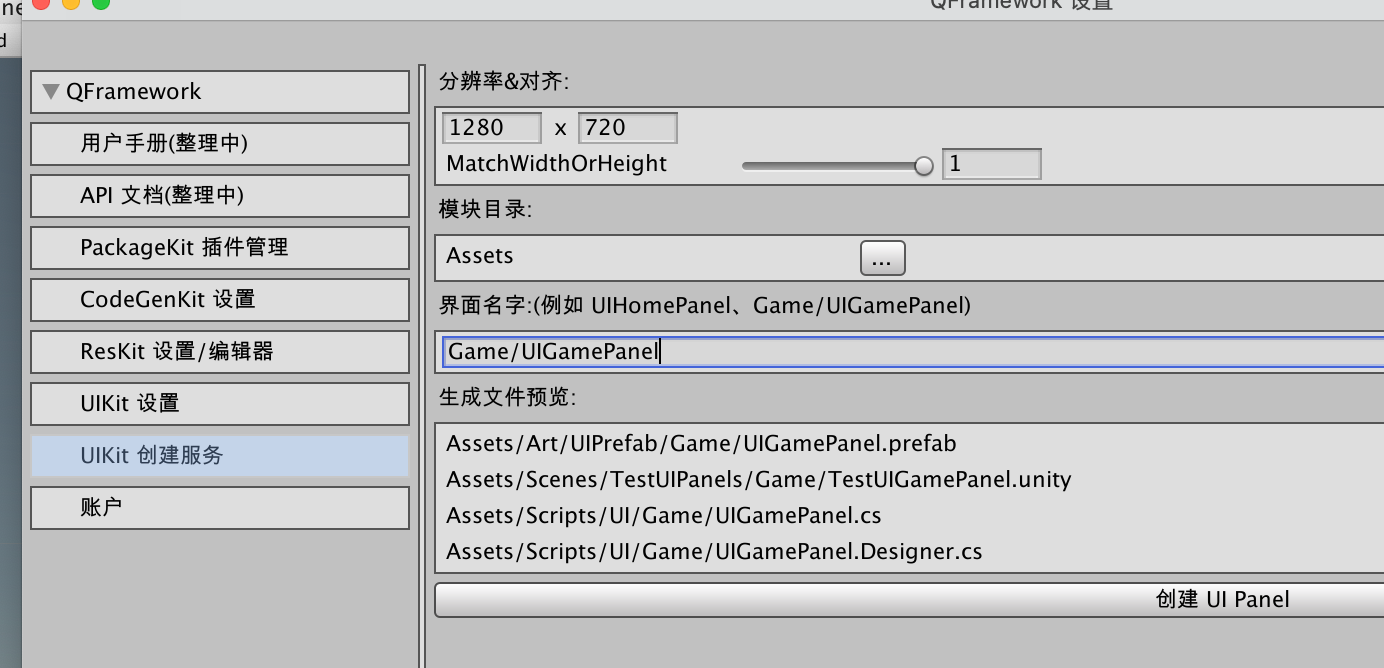
After entering, you can see a preview of the file to be generated.
In this panel, we can also set the resolution and adaptation alignment, as well as the directory of the module. If you don’t want to create files generated according to the specifications in the root directory, you can also create them in other subdirectories.
We click the “Create UI Panel” button.
After clicking, the result is as follows:
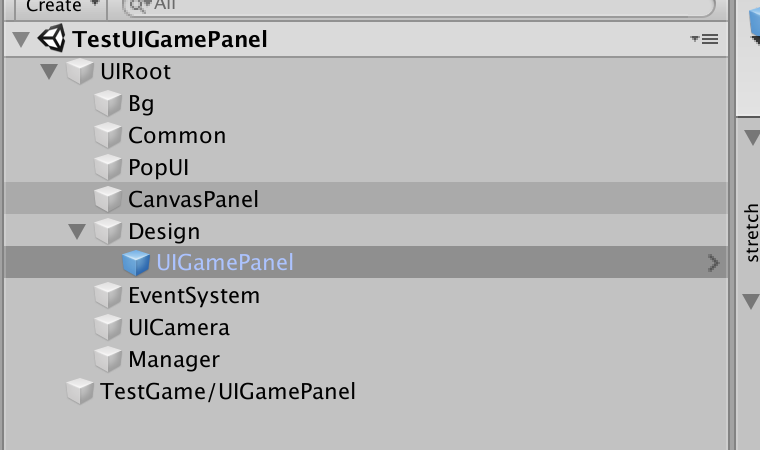
The related prefab, scene, and script have been generated, even the AssetBundle has been marked, as shown below:

This is one of the uses of this tool, which is very convenient and solves a lot of development work for the author.
In the previous article, we learned about the API related to opening and closing the interface.
In this article, we will learn about the sub-interface/sub-control in the UI Kit - UI Element.
Introduction to UI Element
In the previous article, we learned that a UIPanel can automatically bind several sub-controls (Bind). However, when the structure of an interface is complex, it is impossible for a UIPanel to manage dozens of Binds. At this time, we need to perform some grouping operations on the Bind. Our UIElement can come on stage.
Basic Usage of UIElement
The usage is very simple, just change the type of the marked Bind to Element, as shown below.

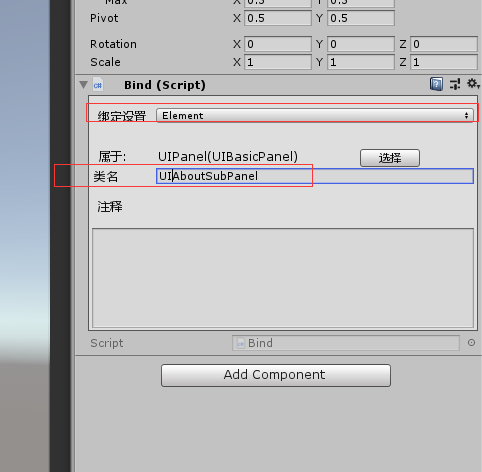
And fill in a name for the generated class name, which determines the name of the generated class. Here, UIAboutSubPanel is filled in.
Then perform the Apply operation.
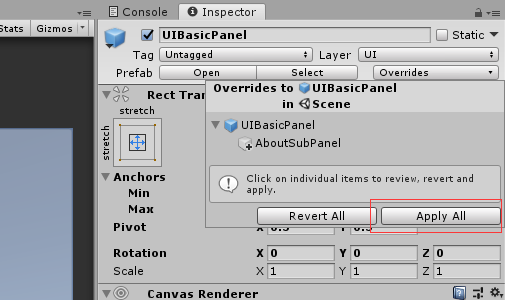
Note that UIBasicPanel is applied here.
Then generate the code, as shown below:
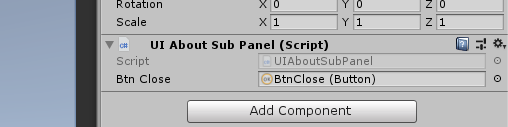
After waiting for compilation, it is shown as follows:

BtnClose is managed by UIAboutSubPanel
Let’s take a look at the script directory:

A new folder is generated in the directory, named after the parent Panel (UIBasicPanel).
Open the UIAboutSubPanel script, the code is as follows:
/****************************************************************************
 * 2022.7 LIANGXIEWIN
 ****************************************************************************/

using System;
using System.Collections.Generic;
using UnityEngine;
using UnityEngine.UI;
using QFramework;

namespace QFramework.Example
{
    public partial class SubPanel1 : UIElement    {        private void Awake()        {        }        protected override void OnBeforeDestroy()        {        }    }
}
Then take a look at the UILoginView.Designer.cs script, as shown below:
/****************************************************************************
 * 2022.7 LIANGXIEWIN
 ****************************************************************************/

using UnityEngine;
using UnityEngine.UI;
using QFramework;

namespace QFramework.Example
{
    public partial class SubPanel1    {        [SerializeField] public UnityEngine.UI.Button BtnStart2;        [SerializeField] public UnityEngine.UI.Button BtnStart3;        public void Clear()        {            BtnStart2 = null;            BtnStart3 = null;        }        public override string ComponentName        {            get { return "SubPanel1";}        }    }
}
The structure is very similar to the previous UIBasicPanel.
Next, you can write some logic related to the sub-module. This is the basic usage of UIElement.
Open multiple interfaces of the same type
UIKit.OpenPanel<UIMultiPanel>(new UIMultiPanelData(), PanelOpenType.Multiple);
How to customize the interface loading method?
Inherit the AbstractPanelLoaderPool class, and then implement a class of IPanelLoader. The reference code is as follows:
using System;
using UnityEngine;

namespace QFramework.Example
{
    public class CustomPanelLoaderExample : MonoBehaviour
    {
        public class ResourcesPanelLoaderPool : AbstractPanelLoaderPool
        {
            /// <summary>
            /// Load Panel from Resources
            /// </summary>
            public class ResourcesPanelLoader : IPanelLoader
            {
                private GameObject mPanelPrefab;

                public GameObject LoadPanelPrefab(PanelSearchKeys panelSearchKeys)
                {
                    mPanelPrefab = Resources.Load<GameObject>(panelSearchKeys.GameObjName);
                    return mPanelPrefab;
                }

                public void LoadPanelPrefabAsync(PanelSearchKeys panelSearchKeys, Action<GameObject> onPanelLoad)
                {
                    var request = Resources.LoadAsync<GameObject>(panelSearchKeys.GameObjName);

                    request.completed += operation => { onPanelLoad(request.asset as GameObject); };
                }

                public void Unload()
                {
                    mPanelPrefab = null;
                }
            }

            protected override IPanelLoader CreatePanelLoader()
            {
                return new ResourcesPanelLoader();
            }
        }

        void Start()
        {
            // 游戏启动时,设置一次
            UIKit.Config.PanelLoaderPool = new ResourcesPanelLoaderPool();
        }
    }
}
If you want to support other ways to load the interface, you can customize it through this method.
In addition, the UIKit in QFramework uses ResKit’s method to load the interface by default.
You can see the following code in the QFramework source code:
using System;
using UnityEngine;

namespace QFramework
{
    public class UIKitWithResKitInit
    {
        [RuntimeInitializeOnLoadMethod(RuntimeInitializeLoadType.BeforeSceneLoad)]
        public static void Init()
        {
            UIKit.Config.PanelLoaderPool = new ResKitPanelLoaderPool();
        }
    }

    ...
}
If you want to use a custom way to load the interface, you need to comment out the above code.
Well, that’s all about customizing the interface loading in UIKit.
Summary of UI Kit
In this chapter, we have touched on the core functions of the UI Kit, as follows:
Code generation of UIPanel/UIElement
Commonly used APIs in UIKit
UIKit.OpenPanel (Async)
UIKit.ClosePanel
UIKit.CloseSelf
UIKit.SetResolution
UIKit.Stack.Push, UIPanel.Back (Pop)
UIPanel lifecycle
UIPanel test scenario generation tool
As long as you master the above, there should be no problem in developing some interfaces.
That’s all about UIKit.